

Step-by-step guide to e-commerce hustle #33
Step-by-step guide to e-commerce hustle #33

Hey all, Happy Friday.
This week we’re going to cut all the BS and show you how to create an online business.
Earlier this week, I explained how to create a consultancy business in 15 minutes for FREE on LinkedIn. It worked, it did what it said on the tin - it took 15 minutes, it was free and at the end you had it set up.
This week I’m going to give an overview of how to create a FREE e-commerce business. I’ll throw in some low-cost/paid recommendations to make your life easier (by low cost I mean $0.20 per item you list - so pretty cheap).
Let’s get started
I’m going to take you through the main things you need to get started, these include…
A payment method - technically I’d call this a payment gateway
A store of some kind - so people can see your products
Products - I’ll show you how to create a bunch of products without holding inventory
Payment System
OK, so you’ve been to a store, right? And perhaps you noticed that before leaving the store with your goods you needed to pay? E-commerce is like that, you’ll need to set that up.

There are a few out there.
Two of the most common ones are Paypal and Stripe. It doesn’t matter which one you use, but I would recommend Stripe.

For the “creating a consultancy business” demo I used Stripe. It seems to be the newer kid on the payment block, so I went with that.
It takes about 5 minutes to create and verify a new account.
Once you’ve done that you can collect money.
The Store
This can get as technical as you want or be as basic as you want.
I’ll give 3 examples starting with the most complicated and finishing with the easiest and probably best option.
Hosting your own store
Now if you're technical like me, you’d be inclined to follow this route but I wouldn’t recommend it, even for people like me.
If you’re not technical - perhaps skip to the next store options.
So to host your own store you’ll need your own hosting provider. Next, you’ll need to install WordPress and then install a plugin called Woocommerce.
This will give you everything you need, but you’ll have to configure a lot.
You’ll also need to manage and maintain the whole thing, including keeping on top of security updates.
Yes, it will give you 100% control and customisation - but you probably don’t need it. And the ‘benefit to headache’ ratio is not worth it.
Shopify
Next on the list is using Shopify.
Shopify is awesome, it does everything for you and makes the whole process easy.
But it comes at a cost, of roughly €32 per month.
TBH - that’s pretty reasonable for what you get, hosting, maintenance, etc.
However, if you are starting off - you might feel €32 per month might be a bit much to cover during the first few months.
To put Shopify in perspective, Gymshark - which is a $1b business now - was built on the back of Shopify. So that should be enough inspiration for you.
To get started, simply go to Shopify, sign up and follow the guidance. It’s a pretty slick process.
Etsy
Last on the list is Etsy, it’s the easiest method and the recommended method for starting out.
Like Shopify, you sign up and boom - you have a store.
The beautiful thing about Etsy is also something you might not like…
… it’s a marketplace.
The good thing about that is that potential customers go onto the marketplace (Etsy) and look around for products. Therefore you don’t need to worry too much about direct marketing, instead, customers should hopefully come across your products.
The downside is, well let’s be honest - what I am showing you is common knowledge to other people - so there could be a lot of other products out there similar to yours, and this means - competition.
The good news is, there’s enough business to go around - and competition should be seen as 2 things…
demand signal in the market
an opportunity to take your share of the market
Etsy obviously wants to make some money off you. It charges a ‘listing fee’ and then takes a % of each item you sell. Fees vary from country to county, but using the US example - $0.20 per product listing plus 6.5% transaction fee for each item you sell. An example they give is…
let’s say you sell an item with a $10 retail price and $4 shipping. Etsy will charge a total fee of $0.65 (6.5%) for the listed product price plus the shipping transaction fee of $0.26 (6.5%) – a total of $0.91 in transaction fees.
So…
You can host your own site (Woocommerce), pay a premium (Shopify) or use a marketplace (Etsy).
I’d recommend Etsy if you’re totally new to this.
The Products
OK, so this is the fun and meaty part of the process.
Let’s split this into 2 parts…
Route 1 - you already have some products to sell
Route 2 - you don’t have any products to sell
Route 1 - you already have some products to sell
So you already have something to sell. Perhaps you’re an artist (I know one subscriber who is) and you want to sell a painting. Or perhaps you make lovely gifts and toys out of wood. Or some other product that you want to sell.
Well, this next step is easy for you…
Simply takes some pictures of the product, add them to your store and then when someone buys it - you’ll get the details and ship it to them.
Lovely.
Route 2 - you don’t have any products to sell
This might be most of us.
I don’t have the patience or the temperament to be an artist, and I definitely don’t have the skill.
So how do I get started?
Easy, use on-demand services.
There are two which jump to mind, Printify and Printful.
They both do the same things, but I am more familiar with Printful, so let’s look at that.

Printful is an on-demand printing service which integrates with Woocommerce, Shopify and Etsy (and others).
In other words, you can design a product on Printful, it will appear in your store and then when someone buys it Printful will make the product and ship it out to the customer on your behalf.
Sweet eh?
Let’s have a look at this in more depth using Stripe and Etsy as an example.
To get started, make sure you have your payment method set up and the store (Woocommerce/Shopify/Etsy)
Next, signup for Printful. Once logged in, look for ‘Store’ on the left menu, then look for ‘Choose Platform’
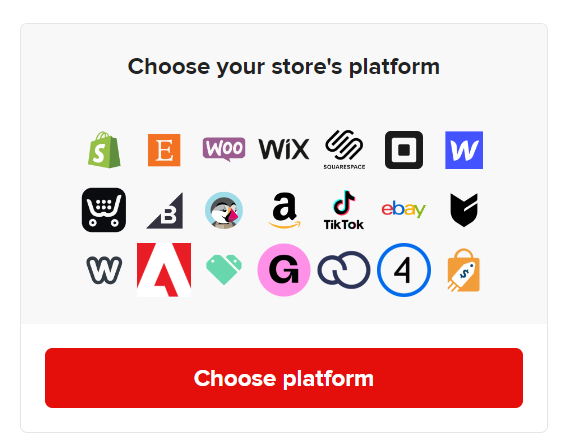
Click that, follow the steps and boom it’s all connected.
Design your products
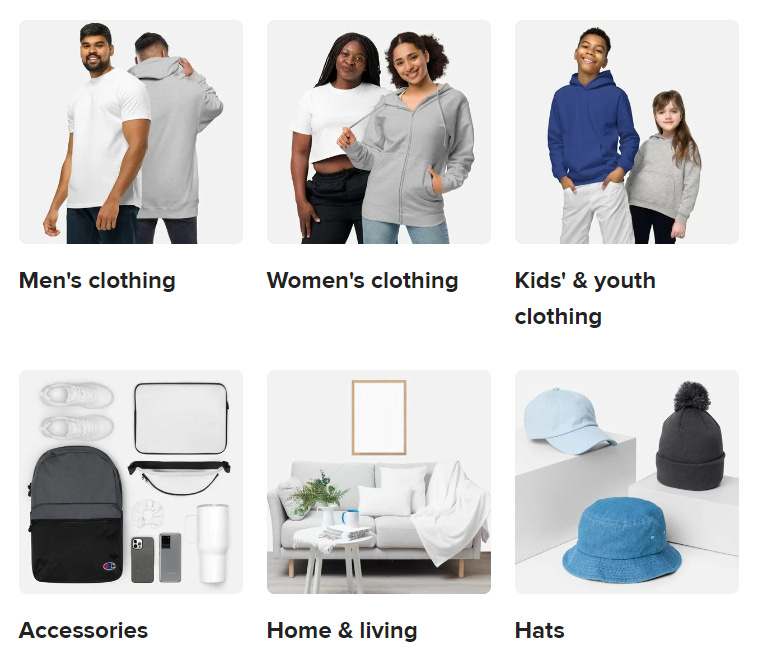
Obviously, Printful can only provide a limited range of products. But to be fair to Printful, they do offer a pretty broad range of products. Things include clothing, phone cases, canvas prints, posters, flags, mugs, and rucksacks. Pretty much anything that can hold a design.
To get started simply pick a product from the list and upload the graphic you want. Another great feature is that you can use the design you uploaded across multiple products.
Below you can see a mug with my lovely face on it (from a very old photo of me being silly). I used that to also create a phone case and the pillow (because I imagine everyone would like to cuddle up to me 🤣)

^ Official newsletter swag
Now if I push these to my store, people would be able to buy them from me. Printful would receive the order, print them on demand and ship the products on my behalf.
So that’s a simple design, just a photo of me… what about something more complicated?
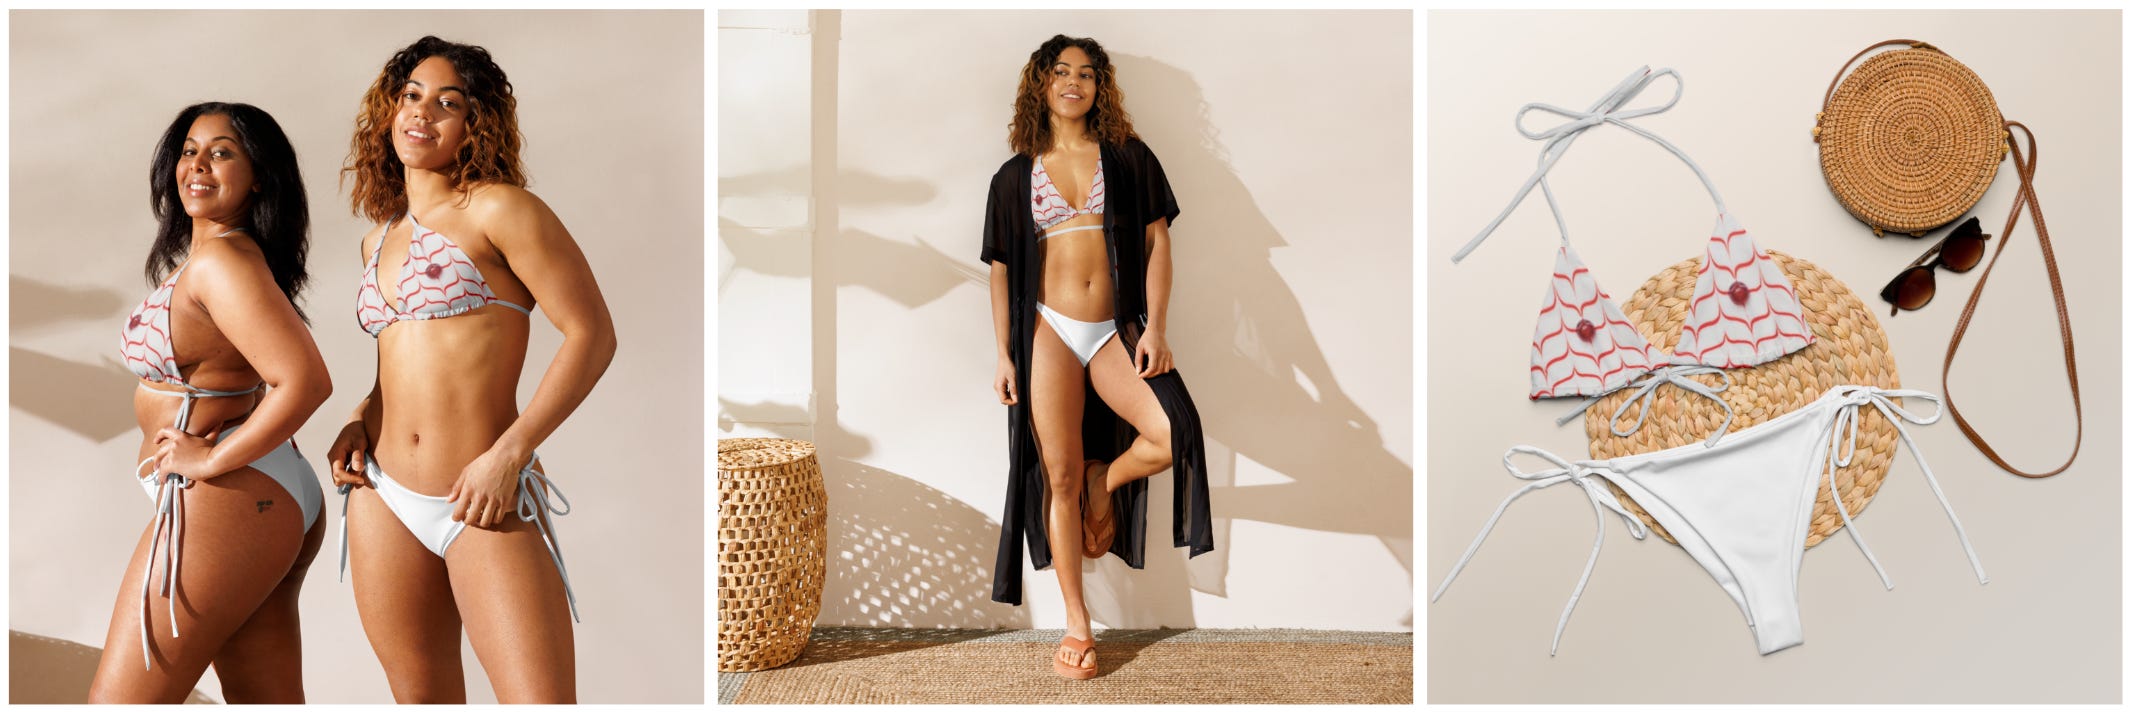
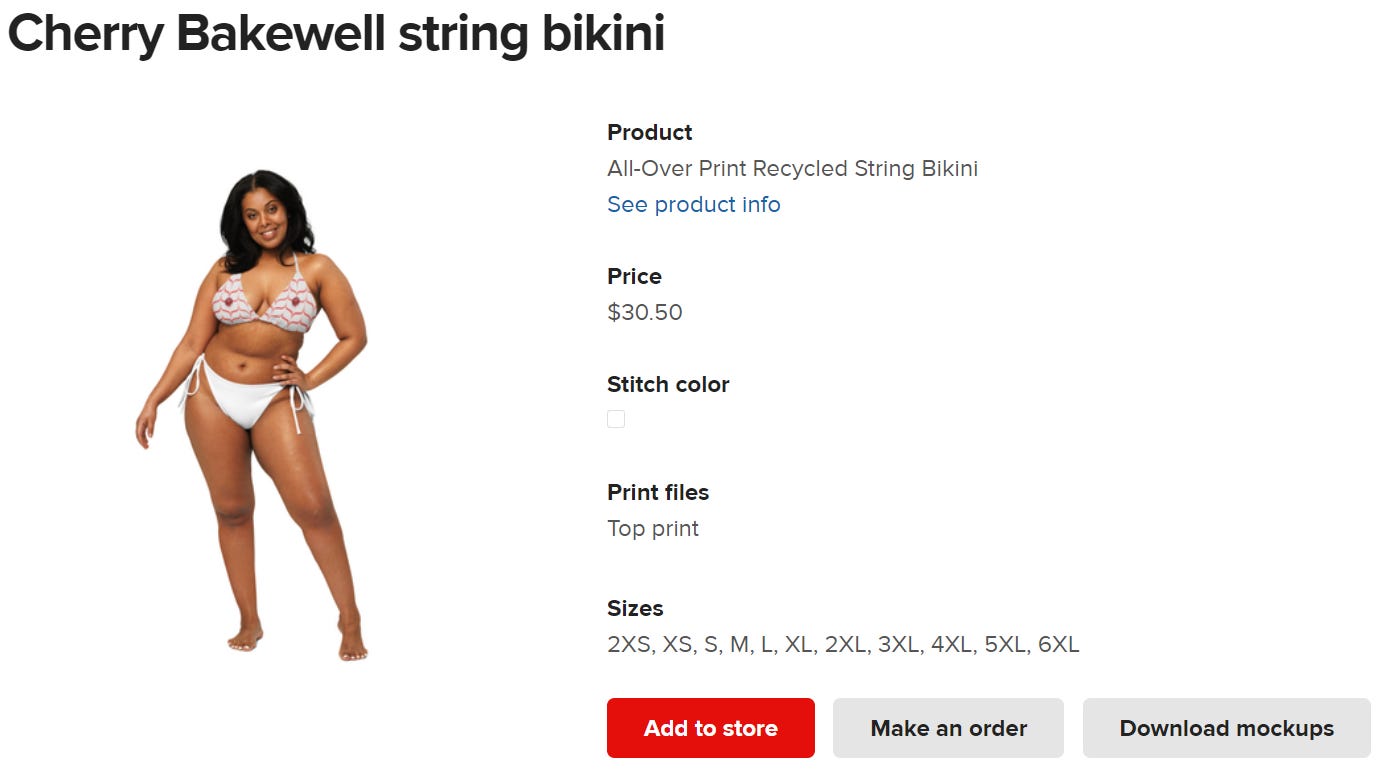
How about a Cherry Bakewell bikini?
This time I downloaded the product guide from Printful, uploaded it to Canva (a free online image tool) and overlayed pictures of a cherry bakewell and lined the cherry’s up with the errmmm… template…
… after it looked aligned I downloaded the image and then uploaded it to Printful.
I can now sell a Cherry Bakewell bikini.
Next is my all-time favourite method.
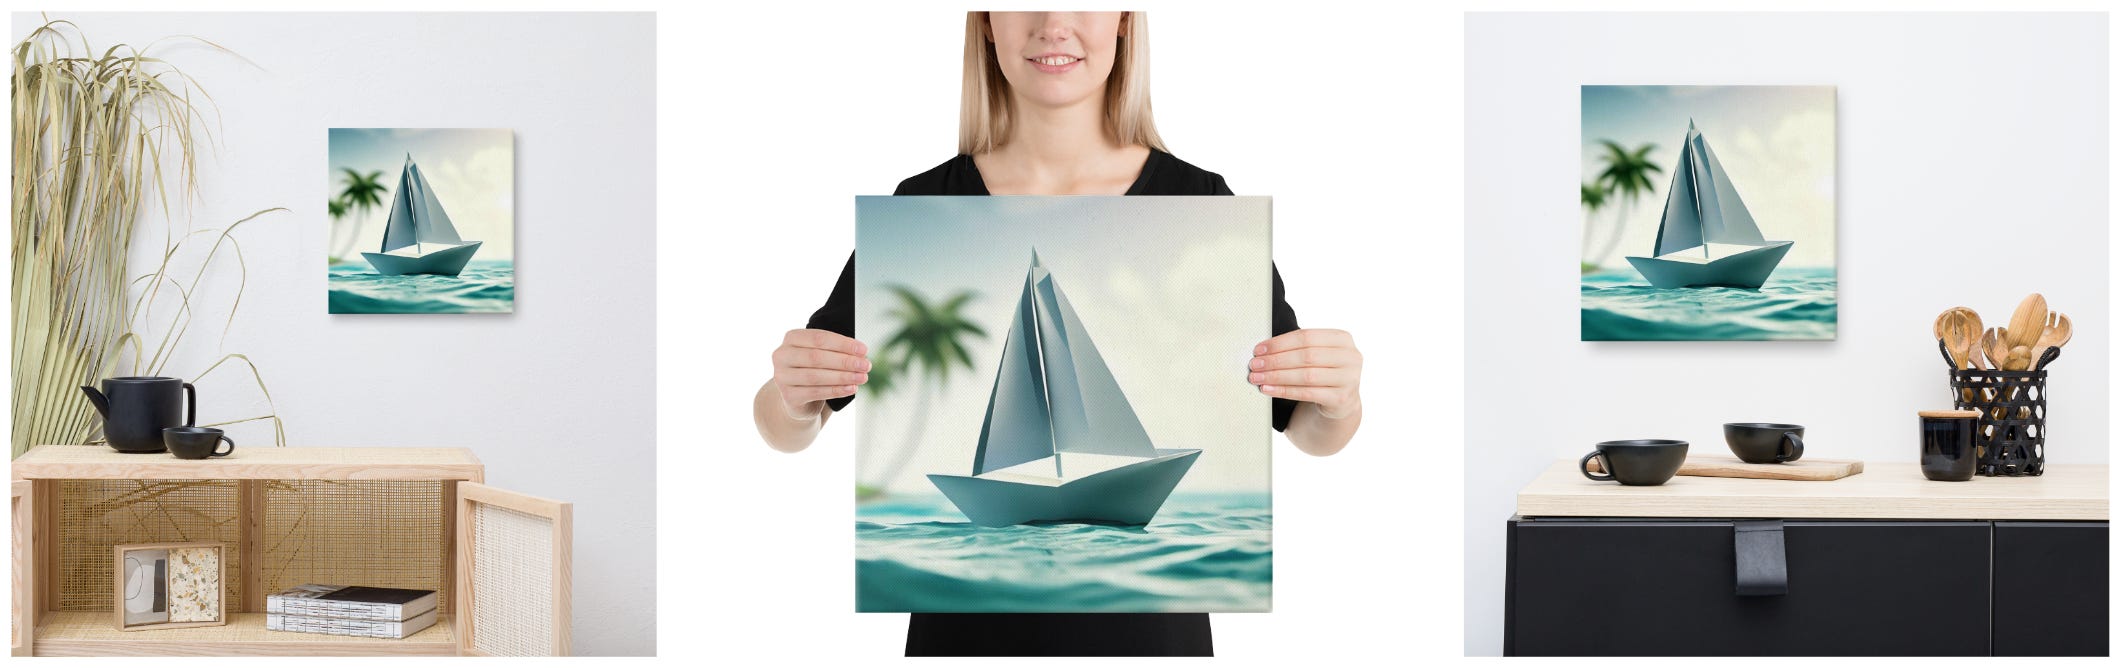
I went to Bing Create, you know the AI tool which makes images for you.
It generated this picture of a boat. I downloaded it and put it into Printful to create a Canvas print. It warned me that the image wasn’t a good enough quality (meaning too small) so I found a website which would upscale it for me (make it bigger).
I then tried again, and now I have a wonderful canvas print of a boat, made by AI, which I can sell on my store.
Put them on your store
Now one extra great thing Printful does for you is that it makes mock-up images for you.
In all the examples above, Printful created those images for me to put on my store.
The next great thing is, you don’t need to mess about with them.
Once you have created the product in Printful you simply click “Add to store” and it handles everything for you.
You can still customise things as needed, but the hard work is done for you.
Summary
And that’s pretty much it.
Obviously, there are more details to each step, and we haven’t included marketing, etc. But that’s all just noise for now.
If you follow these steps you’ll have an online store, products to put on there (without holding stock) and a way to receive payments.
You’ll still need to figure out your pricing strategy and also how to handle returns. But don’t overthink that, just get it started and worry about that when it happens.
Fin.
I hope this was useful.
I’m not expecting everyone to create an online store, but I did want to remove some barriers and excuses and give people something to think about.
As always, I hope you enjoy the weekend and have a great week.
Best, John